When you are in the market for a JBC modular system, selecting the optimal set up for your application is crucial. And with JBC you can really personalise your station according to your soldering or rework needs.
Before buying a JBC Control Unit and the accessories that go along with it, some thought is required as it can be an expensive purchase! Investing in a JBC modular system allows you to complete a more versatile range of work. Therefore, tackling tasks with more precision and proficiency.
Kaisertech is here to offer our expertise to assist with your decision. Read below for our guide to building your JBC modular system, detailing the things you must consider when choosing a JBC unit, a stand, tools and tip cleaners for your workplace!
For a basic working system, you will need the following:
| Contents |
| 1 - Control Unit |
| 2 - JBC Stand |
| 3 - Soldering Tool |
| 4 - Soldering Cartridge |
So lets walk through how to piece together your JBC modular system...
Step 1: Choose A Control Unit
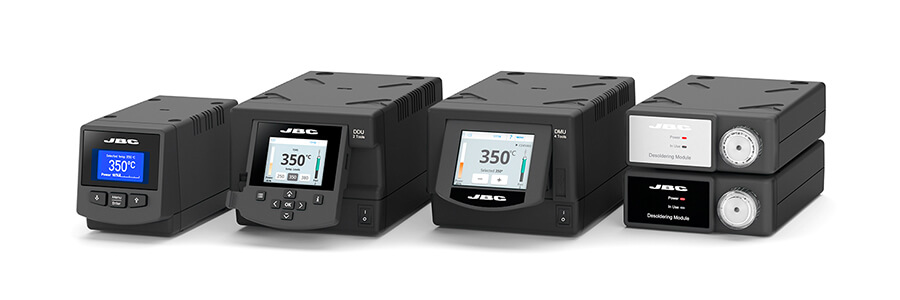
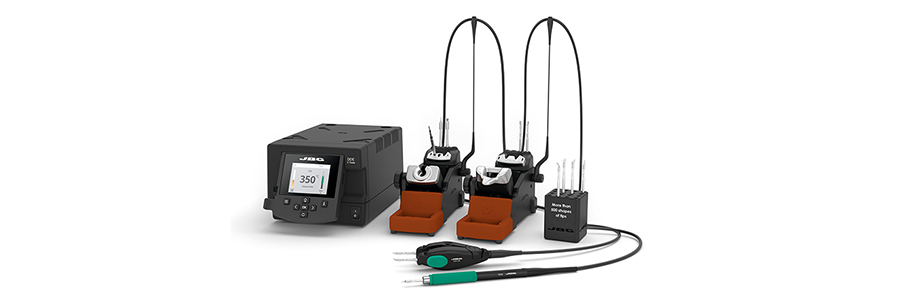
The first step to building your JBC modular system is choosing a control unit, and this depends on how many tools you need. Every control unit is compatible with most JBC tools. All the units include JBC's exclusive heating system that increases work efficiency due to its quick temperature recovery.
JBC offer 3 types of control unit: 1 tool, 2 tools and 4 tools. These control units are all suitable for soldering or desoldering and are fully compatible with 10 different JBC tools.
Step 2: Choose A Stand
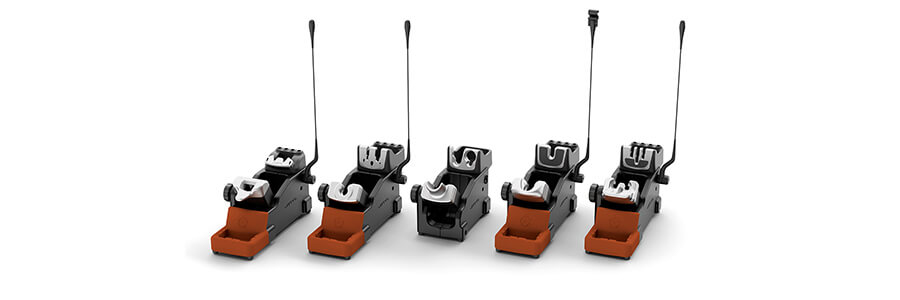
The second stage is to choose a JBC stand. These have been recently upgraded to include the tip cleaner with an antisplash membrane (as you can see in the image above).
All JBC stands include a sleep and hibernation mode which automatically detects the tool in the stand and reduces the tip temperature below the solder melting point.
The tip life lasts 5 times longer due to the hibernation cutting off the power supply which prevents oxidation. The stand that you choose depends on which tools you need for application and whether you are soldering or desoldering.
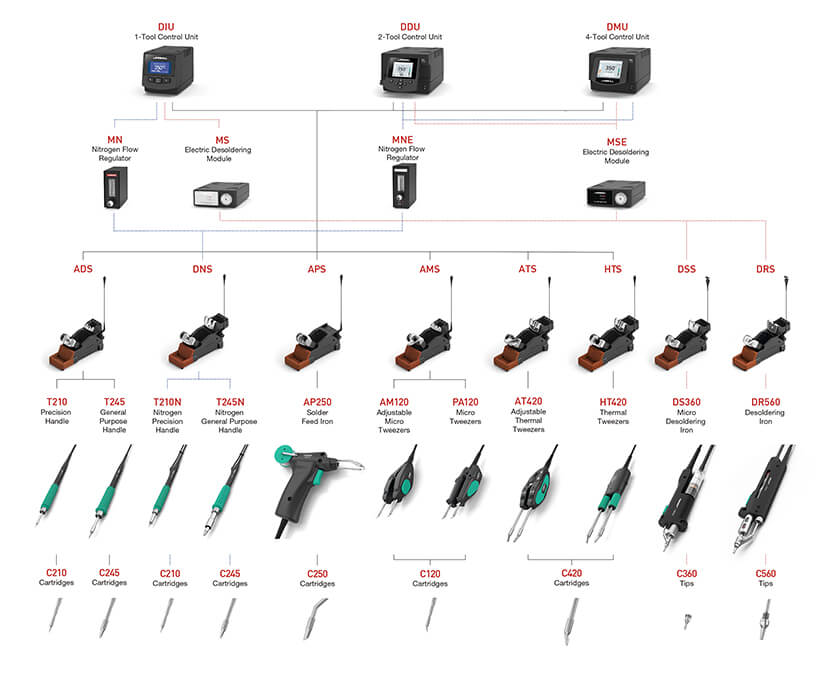
If you are using T210 & T245 Handles, we recommend the ADS Stand. The APS Stand is suitable for the AP250 Solder Feed Iron, the HTS Stand works exclusively with HT420 Thermal Tweezers and the DSS Stand is appropriate for the DS360 Micro Desoldering Iron. All tools are compatible with the DIU, DDU and DMU Control Unit.
You could also decide to accompany your set up with an automatic tip cleaner. These are a great option if your budget allows - cleaning your soldering tip in under a second. You can learn more about these systems here.
Step 3: Choose A Tool
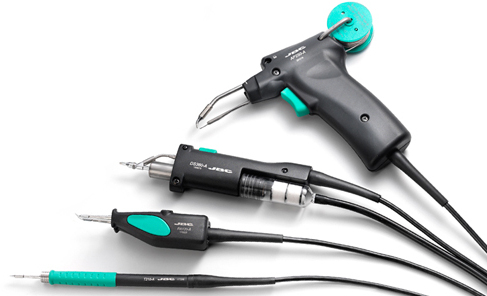
You will need to accompany your control unit and stand with a tool (or handpiece). The tool you select will depend on the application you are undertaking. e.g., whether you are soldering or desoldering. JBC offer many different tools and handpieces for your workplace requirements.
JBC offer a variety of soldering handpieces which come under the T245 Purpose Handle Range. These handles have a soft foam grip which provides thermal insulation and are perfect for both Surface Mount Devices (SMDs) and jobs with high power requirements, such as ground plane soldering.
The Solder Feed Iron is perfect for repetitive tasks and ensures maximum comfort when in use. This tool incorporates an anti-rotation screw which adjusts cartridge alignment to suit the component and ensures easy management of the amount of tin dispensed.
Micro Tweezers do the trick for fast and precise SMD work with chip components and small/medium SOP from PCB assemblies. JBC offer two types of micro tweezers: adjustable and nonadjustable. The adjusting system ensures that the cartridges are aligned evenly, with vertical and rotatory symmetry.
If you are looking for a tool that is suitable for soldering and desoldering, the HT420 Thermal Tweezers are perfect for this. These tweezers are designed for soldering and desoldering SMDs such as QFP, PLCC, SOIC etc.
For your desoldering jobs of SMD or conventional components, the DS360 Micro Desoldering Iron is most suitable. This tool can provide up to 40W. For desoldering jobs of through-hole components and removing excess solder after SMD rework, we recommend the DR560 Desoldering Iron. This can provide up to 160W.
Step 4: Choose The Cartridge
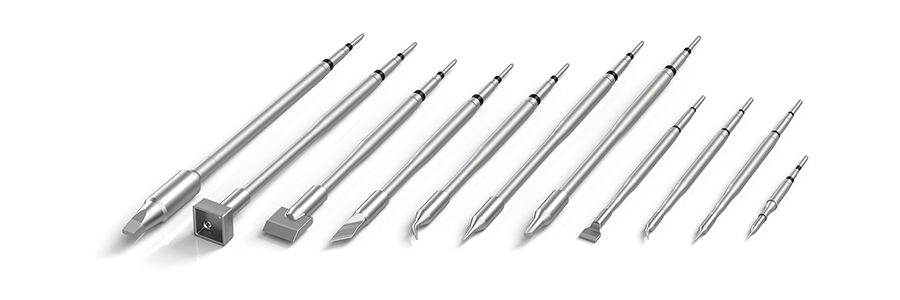
The final piece of the puzzle is the soldering cartridge that you select. There are well over 500 different shapes and sizes that you can select from - but the tool you select will narrow this option down for you.
Here are a few handy tips that can help you select the right tip for your application:
- Go for the larger tip - this improves thermal transfer as the larger the tip, the better the accumulated heat.
- Understand the task you require from the tip - Precision, general, drag?
- Handpiece and station compatibility for the shape your application requires. Do you need to consider using a different JBC tool if your desired shape is not available?
JBC's range of tips are flexible to ensure that all individual needs are covered. However, custom tips can be crafted upon request if you contact our team. You can learn more about selecting your JBC soldering cartridge here.
To Conclude…
When you are in the market for a Modular Soldering Station, carefully assessing your application requirement will be key in ensuring you end up the best possible product.
Remember the following rule of thumb for modular JBC systems - "For a basic working system, you will require one of the following: 1 control unit, 1 stand, 1 tool and a cartridge."
For any assistance in finding the right JBC Soldering Station for you, give our experts a call and we can ensure you make the most optimal choice. Call 023 8065 0065 or email [email protected].
Recent Posts