The use of a torque meter is one of the most valuable assets to any assembly process that uses torque equipment.
Verifying the torque settings for your assembly process is crucial before undertaking work with your torque driver.
Torque measurement is universally vital across many industries. Without it, there is no true way of determining torque slippage, faulty equipment, or other fastening errors.
This is particularly the case when looking at electric torque screwdrivers.
In this article, we will delve into why it is important for you to use a torque meter, how you should use it, and its importance to the quality control processes on your assembly line.
Hopefully, by the end, you will have a greater understanding of the importance of investing in torque meters for your assembly processes.
What Is Torque Testing?
Firstly, let us outline exactly what torque testing is.
Torque is the force required to make something turn. So, torque testing measures the amount of torque that is applied to an object, such as a nut or screw. This measurement is assigned a value in Newton Meters.
Understanding these Nm levels is essential. You can be assured that every screw on your assembly line is given the exact same treatment.
To measure this, you will require a torque meter (sometimes called a torque tester/analyser), and in some cases a fidaptor. Ensure that the torque meter you use has the torque capacity that is compatible with the electric screwdriver that you are using. But we will delve into the how’s and why’s a bit further down.
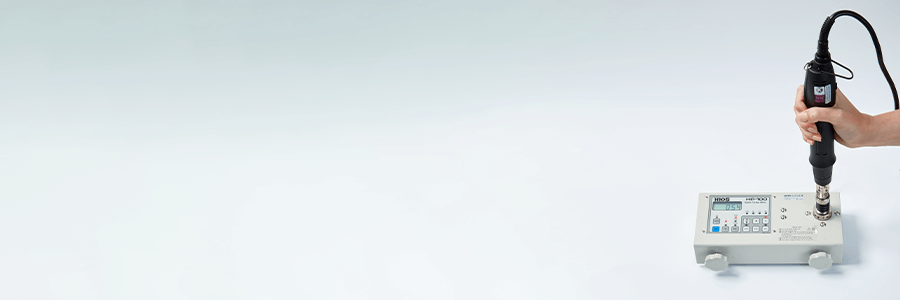
How Do You Use A Torque Meter?
Using a torque meter is quite a simple process, once you know the steps to follow. Here we will outline the steps needed.
- Firstly, ensure to insert the Fidaptor into the torque meter socket. The screwdriver you are measuring will then need to be inserted into the head of the Fidaptor for measuring. Ensure that the Fidaptor you are using is compatible with the driver bit you are using.
- Next, you should run the screwdriver in reverse slightly, so that the spring can be turned by hand. This helps to reduce the tension in the Fidaptor spring, allowing for a more accurate reading.
- Ensure to set the torque meter to zero. Then run the driver in forward until it comes to an automatic stop. This will engage the Fidaptor spring and make it tighten.
- Once the driver has come to a stop, the reading can be taken, and will be displayed clearly for the user to take a reading. The driver can then be run in reverse once more to release the tension and remove the tool.
The above steps outline a basic process to operate a torque meter with a fidaptor. We always recommend that you consult the operator’s manual for the torque meter you are using, however. You can find a range of torque testing equipment readily available here.
When Should You Test Your Torque Tools?
Torque meters will be used at 3 different stages in the assembly process.
Before – Just like people test their ESD wristbands before entering and EPA, torque drivers need to be measured prior to being used in the assembly process. Often this equipment can be used for tool setup or calibration to achieve the necessary torque. This ensures that the tool has the required torque for the process, enabling repeatability for the application.
During – Some drivers can benefit from connection to a constant monitoring system. This keeps tabs on the performance of the driver throughout the process, allowing you to audit and verify the tool when in use.
This is often done through the use of a control unit such as the ParaMon-Pro X.
After – Some manufacturers want to conduct final testing after the assembly process has taken place. This will often be one final inspection once the assembly process has concluded. This gives an accurate assessment for the torque delivery to the fastening. Testing in this fashion will also enable the detection of any loose or missed fastenings.
The Benefits Of Torque Testing
Torque testing is a vital part of any assembly process. For good reason, it is standard practice to ensure all torque tools safe, reliable, and capable of producing the quality that your processes demand.
The Benefits of using torque testers include the following:
- Information on the cause of torque-related issues during the process.
- Address problems directly at their source to ensure optimal problem-solving.
- Prevent over-tightening and under-tightening issues that can cause product failures.
- Ensuring the overall integrity and accuracy of the assembly process.
As you can tell from the above points, torque testing is a key component to any quality control process on an assembly line.
Common Consequences Of Incorrect Torque Settings
Overtightening
Often, inexperienced operators will overtighten a screwhead, assuming that the tighter the screw, the less chance it has of loosening.
In actual fact, this can result in stripped screws, snapped screw heads, and even damage to the pre-tapped threading.
Under tightening
This is a result of using drivers that are calibrated with too low of a torque setting. It leads to the nut vibrating or becoming loose, which is never a good outcome.
The joint does not have enough clamping force to hold the sections together, which can lead to slippage, undue joint stress, and even breakage within the product.
How To Ensure You Are Always Using The Correct Torque Setting
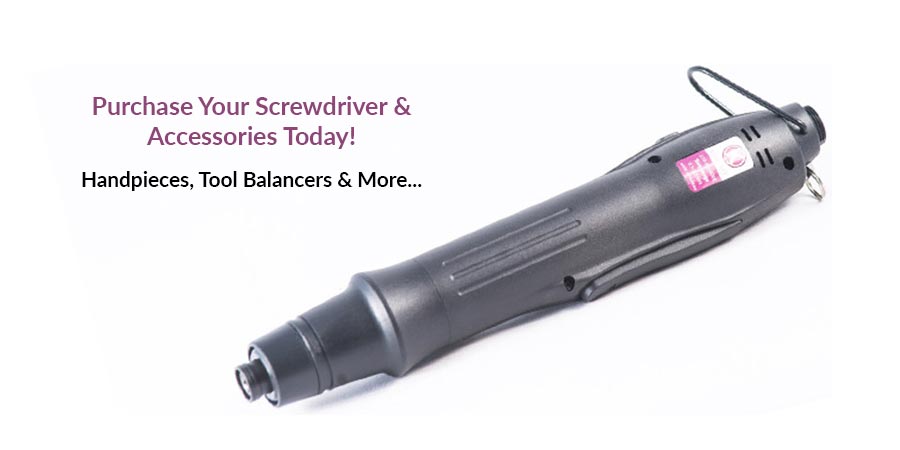
Select The Right Tool
Now, this might seem like an obvious one, but tool selection is imperative. You need to know that the driver is suited to your application.
There is a lot of disparity in the torque ranges that drivers work at. Some have pre-set torques whereas others can be user-defined.
As a rule of thumb, we always advise that the torque range you need falls into the middle of the torque capabilities of the driver. For example, if you require 0.75 Nm, selecting a driver that worked at torque ranges roughly between 0.5-1 Nm would be optimal.
Know Your Application Inside Out
To ensure the correct tool setting for the application, the engineer needs to determine many elements. These include:
- The maximum load on the driver.
- Strength of the joining material.
- Whether the joint is hard or soft.
The right torque tester depends on the assembly process. So understanding this will help you select the most optimal torque meter for your application.
Use Torque Testers
Torque analysers provide a quick and simple means of calibrating your tool to its desired setting. They are useful for a number of reasons, including:
Safety – Improperly calibrated tools can lead to disastrous errors. Some of these errors can even compromise the safety of the person using the product. Testing that the tool working on these products is at the desired torque setting is therefore crucial.
Repeatability – Consistent performance from your torque tools is essential. Torque meters provide you with a means of ensuring this with every use.
Quality Control – An optimal QC plan prevents tightening errors from occurring due to incorrect torque settings.
Regular Scheduled Maintenance
Torque setting maintenance should make up a key part of your quality control processing. Developing a torque verification program will be key to ensuring your tools are always operating in the desired torque range.
This will help to validate your assembly process, highlighting any areas that need adjustment. For it only takes one incorrectly fastened screw to cause a product failure.
It is crucial to consider having a daily torque verification plan when working with any critical assembly part. Having this in place highlights any potential problems with the equipment and prevents fastening errors. This is because only the operator will use the desired torque setting at all times in the assembly process.
All tools naturally slip out of their torque setting over time, requiring recalibration. And the right program allows this to be verified before use.
You can either remove, repair or replace the tools that drift too far out of the tolerance range.
Summary
To conclude, we hope that this article has highlighted the important role that torque testing plays in the quality control aspect of your assembly line.
Without it, you can never have complete confidence in the output of your work. Torque meters are simple to use and provide a great return on investment.
If you require any assistance in acquiring the correct torque testing equipment, give our team a call on 023 8065 0065 or email us at [email protected].
Related Posts
Recent Posts