We were challenged with the question recently, regarding “What not to do when soldering”.
There are many articles out there advising on best practices, but nothing to dispel the soldering wives’ tales that could be affecting your soldering efficiency.
So without further ado, let’s get stuck in and decipher the do’s and don’ts of soldering.
1 - Pressure When Soldering
Do Not Apply Too Much Force
Soldering is an art form that requires practice to master. Therefore, applying the right amount of pressure is not necessarily something that comes naturally.
It can be a common misconception that in order to solder correctly, the soldering tip needs to be pressed down onto the PCB.
This leads to excessive pressure being applied through the cartridge. Consequently, this damages the long-lasting plating of the soldering tips, lessening their lifespan.
Pressing the cartridge down neither improves the solder joint nor speeds up the process.
Knowing the sweet spot simply takes time and practice. But learning to solder with the correct pressure allows the user to become more efficient with their soldering technique.
Do Make Surface Contact With PCB & Wire
As mentioned above, the correct soldering technique is all about finding that sweet spot.
For most hand soldering applications, you will need to use both hands – one for the soldering handpiece and the other for the wire. Ensure that everything is within arm’s reach before commencing also.
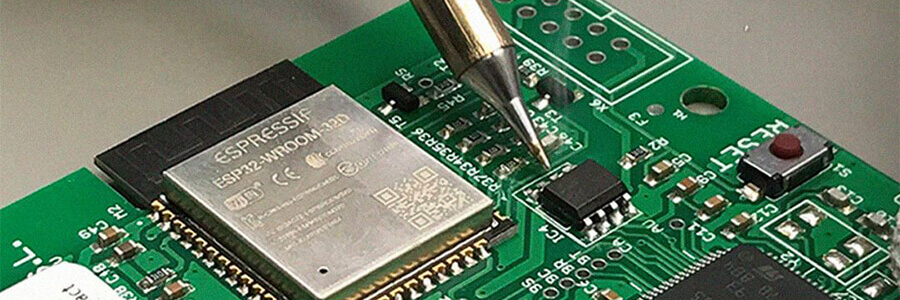
When soldering, you should ensure that the soldering iron contacts both the wire and the PCB.
Solder will always flow towards heat.
So hold for a couple of seconds until you see the flow of solder in and around the joint before carefully lifting the tool away (be careful not to jerk).
2 - Treatment Of Your Soldering Tool
Do Not Leave Tool Unattended
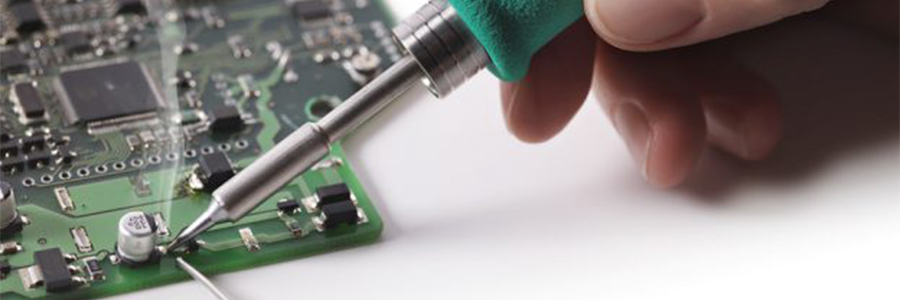
By leaving your soldering tool unattended on the table, you are committing one of the cardinal sins of the soldering process.
Regardless of whether the soldering iron is turned on or off, it should always be housed within the corresponding stand.
These stands exist for a reason, so use them!
You should never place the stand on the table whilst preparing other equipment. These tools can reach very high temperatures, which can easily burn through other materials if simply left on the side.
And if soldering tools can burn through a material with ease, think of what it could do to your skin if accidental contact is made!
Do Return Tools To Stands
You should always ensure that once soldering has ceased, the tool is shelved back in the stand.
Returning the tool to your stand alleviates the problems mentioned in the above paragraph. Your tool will be stored away securely, lessening the likelihood of it suffering damage. The user is also safeguarded from accidentally touching the piping hot soldering iron, definitely for the best!
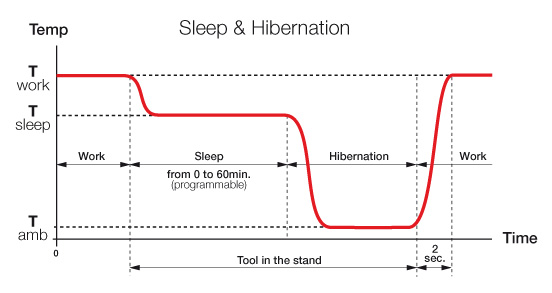
If you are using JBC equipment, housing the tool back in the stand also provides another additional benefit.
When the handpiece is replaced back into the stand, it kicks into life JBCs intelligent heat management system. This helps to extend cartridge life by preventing oxidisation, putting the tool in hibernation or sleep mode when not in use.
You can learn more about this here.
3 - Extracting Cartridges From Your Tools
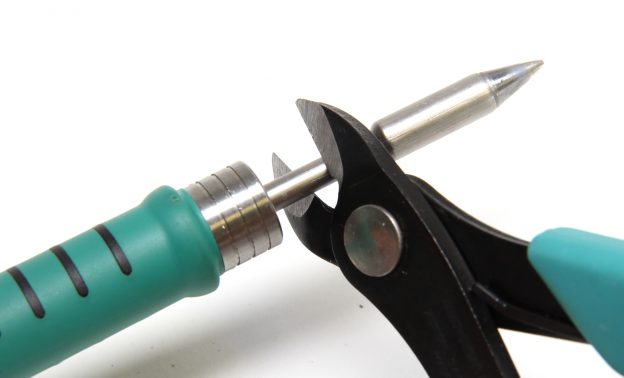
Do Not Use Pliers To Remove Cartridges
Removal or adjustment of a cartridge within the handpiece of your soldering iron should be conducted with the utmost care.
Soldering cartridges are complexly designed for transferring heat. Using any foreign tool to pull them from the grip of the tool can damage them beyond repair.
Using pliers to remove a cartridge from the handle applies pressure that can deform the shaft, damaging the heating coil within the tip.
This is one of the most common types of abuse that occurs. The rough edge of standard pliers does not possess the finesse required to successfully remove the soldering cartridge.
You can purchase specially designed flat tip pliers, but these are designed for the removal of specific ranges of soldering tips.
On the whole, pliers are a definite no-no.
Do Use Extractor Stands Or Manual Processes
If relied on pliers to remove your soldering tips, then you might be wondering what the best method is to remove soldering cartridges.
The easiest method is to wait for your cartridge to have completely cooled, before loosening and removing the cartridge by hand.
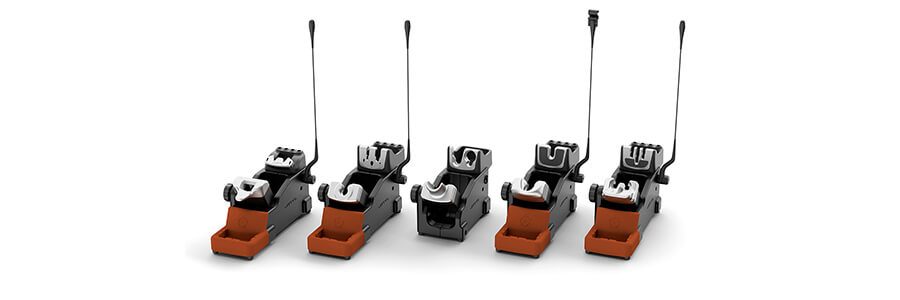
If the soldering equipment you use is from JBC, then they provide an additional simple and readily available solution.
With JBC, each of the stands comes with a specially designed cartridge extractor. This provides simple extractor functionality to seamlessly switch the cartridge in your handpiece.
This helps to improve efficiency and alleviates the need for any extra tools for cartridge extraction. The process takes only a couple of seconds and allows the user to store multiple cartridges at once.
4 - Maintenance Of Your Soldering Cartridges
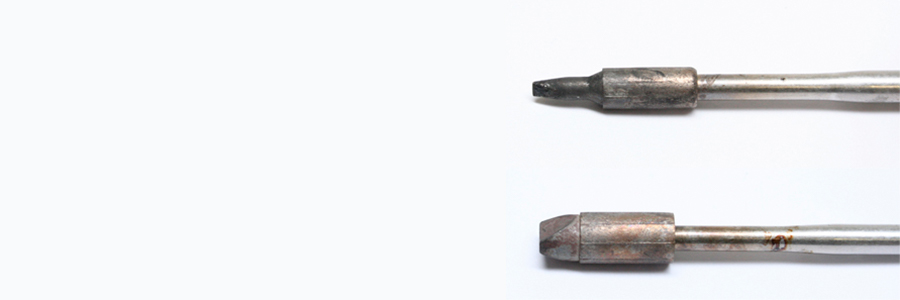
Do Not Use Oxidised Soldering Cartridges
There are certain severities of oxidisation that a soldering tip cannot recover from.
When a cartridge suffers from oxidisation, the colour of the tip will appear darker. No amount of tinning will be able to negate the consequences of this type of oxidisation. You might be able to reactivate the cartridge, but this is a separate, stand-alone topic.
If you notice signs of oxidisation, never solder with that cartridge.
Oxidisation drastically affects the thermal transfer of your soldering cartridges. In layman’s terms, a rusty or dirty surface on the tip of your cartridge will not sufficiently transfer the heat required to produce a reliable soldering joint.
The simple solution for this is to either replace, re-tin or reactivate any cartridge where you notice signs of oxidisation!
Do Always Tin Your Soldering Tips
We touched upon this briefly above, but the best practice for cartridge maintenance is to ensure that you are always tinning your soldering cartridges.
This should be conducted both before and after you use your soldering tool.
Tinning your soldering cartridge involves the application of a small coating of solder that has been left to set on the soldering tip. This will provide a protective layer between the soldering cartridge and the outside air.
A regular cleaning schedule, coupled with consistent re-tinning of your cartridges ensures that once the tool is shelved back in the stand, they do not fall foul of oxidisation.
If you need any further information on how to keep your soldering cartridges clean, check out our handy tip life guide here.
5 - Tip Cleaning
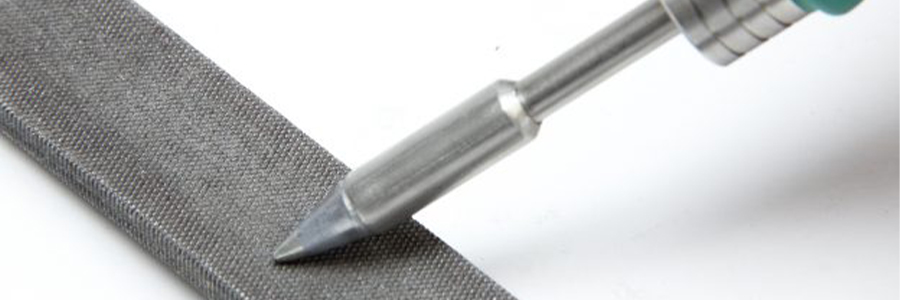
Do Not File Cartridges
Soldering has advanced significantly over the years.
Things that you could once get away with on old-fashioned soldering irons simply do not apply to modern-day processes. The act of filing away any corrosion on your soldering tip certainly falls into this category.
Now in theory, if you consider how this conceptually works, filing away corrosion would make sense.
However, modern-day soldering cartridges are designed with iron plated coating, that under no circumstances should be sanded or filed.
This iron plating acts to increase the life of the tip. Once filed away it would only be a short time before the tip corrodes again. Therefore, the cartridge would shortly require replacement.
If you look after your soldering cartridges you can significantly extend their lifespan.
Do Use Manufacturer Recommended Cleaning Methods
There are several types of cleaning methods. Conventionally, the most popular methods are manual means of cleaning, involving brass wool or sponges (which we will go into more detail about below). The other is an automatic tip cleaner, which offers a quicker way to clean your cartridges.
When cleaning through one of these methods, you are far less likely to damage the cartridge, thanks to their non-abrasive means. Considering that you should be cleaning your tips before, during and after - getting the cleaning method right is imperative.
As stated above, you can clean your tips manually. Although this is slower, it requires less capital investment in equipment. If these methods begin to not work, you can always rely on a tip tinner, or cleaner. However, this should be used when the other methods, sponges or wool, fail to work.
More sophisticated solutions can also be purchased. These run-on automatic motors with brass brushed running on an automatic motor. Using an automatic tip cleaner can save you precious time, with a cleaning time of only 1 second. Learn more about these here.
6 - Use Of Soldering Sponges
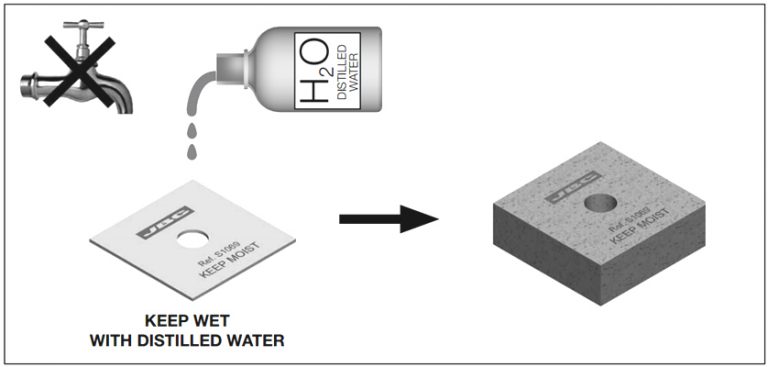
Do Not Use Tap Water
Tap water contains a multitude of ionic impurities that can negatively react with your soldering cartridges.
These can range from micro-organisms all the way up to suspended particles such as lime, salt, or even chlorine.
Contamination of your soldering tip through tap water can therefore cause weaker solder joints. We always recommend that you use de-ionised water to make your sponge damp.
De-ionised water has had the particles removed through chemical means.
Do Use Damp Solder Sponges
If you are going to be using a sponge for cleaning your soldering cartridges, there are a couple of housekeeping rules that must be followed.
The first is that you must be conservative with the amount of de-ionised water you put on the sponge – prior to use. It is important that the sponge is wet but not sodden.
A dry sponge must also be avoided as it can damage the tip every time it is used.
You should ensure that the sponge is damp, but not swamped, along with also being changed periodically.
7 - Choosing The Soldering Tip To Work With
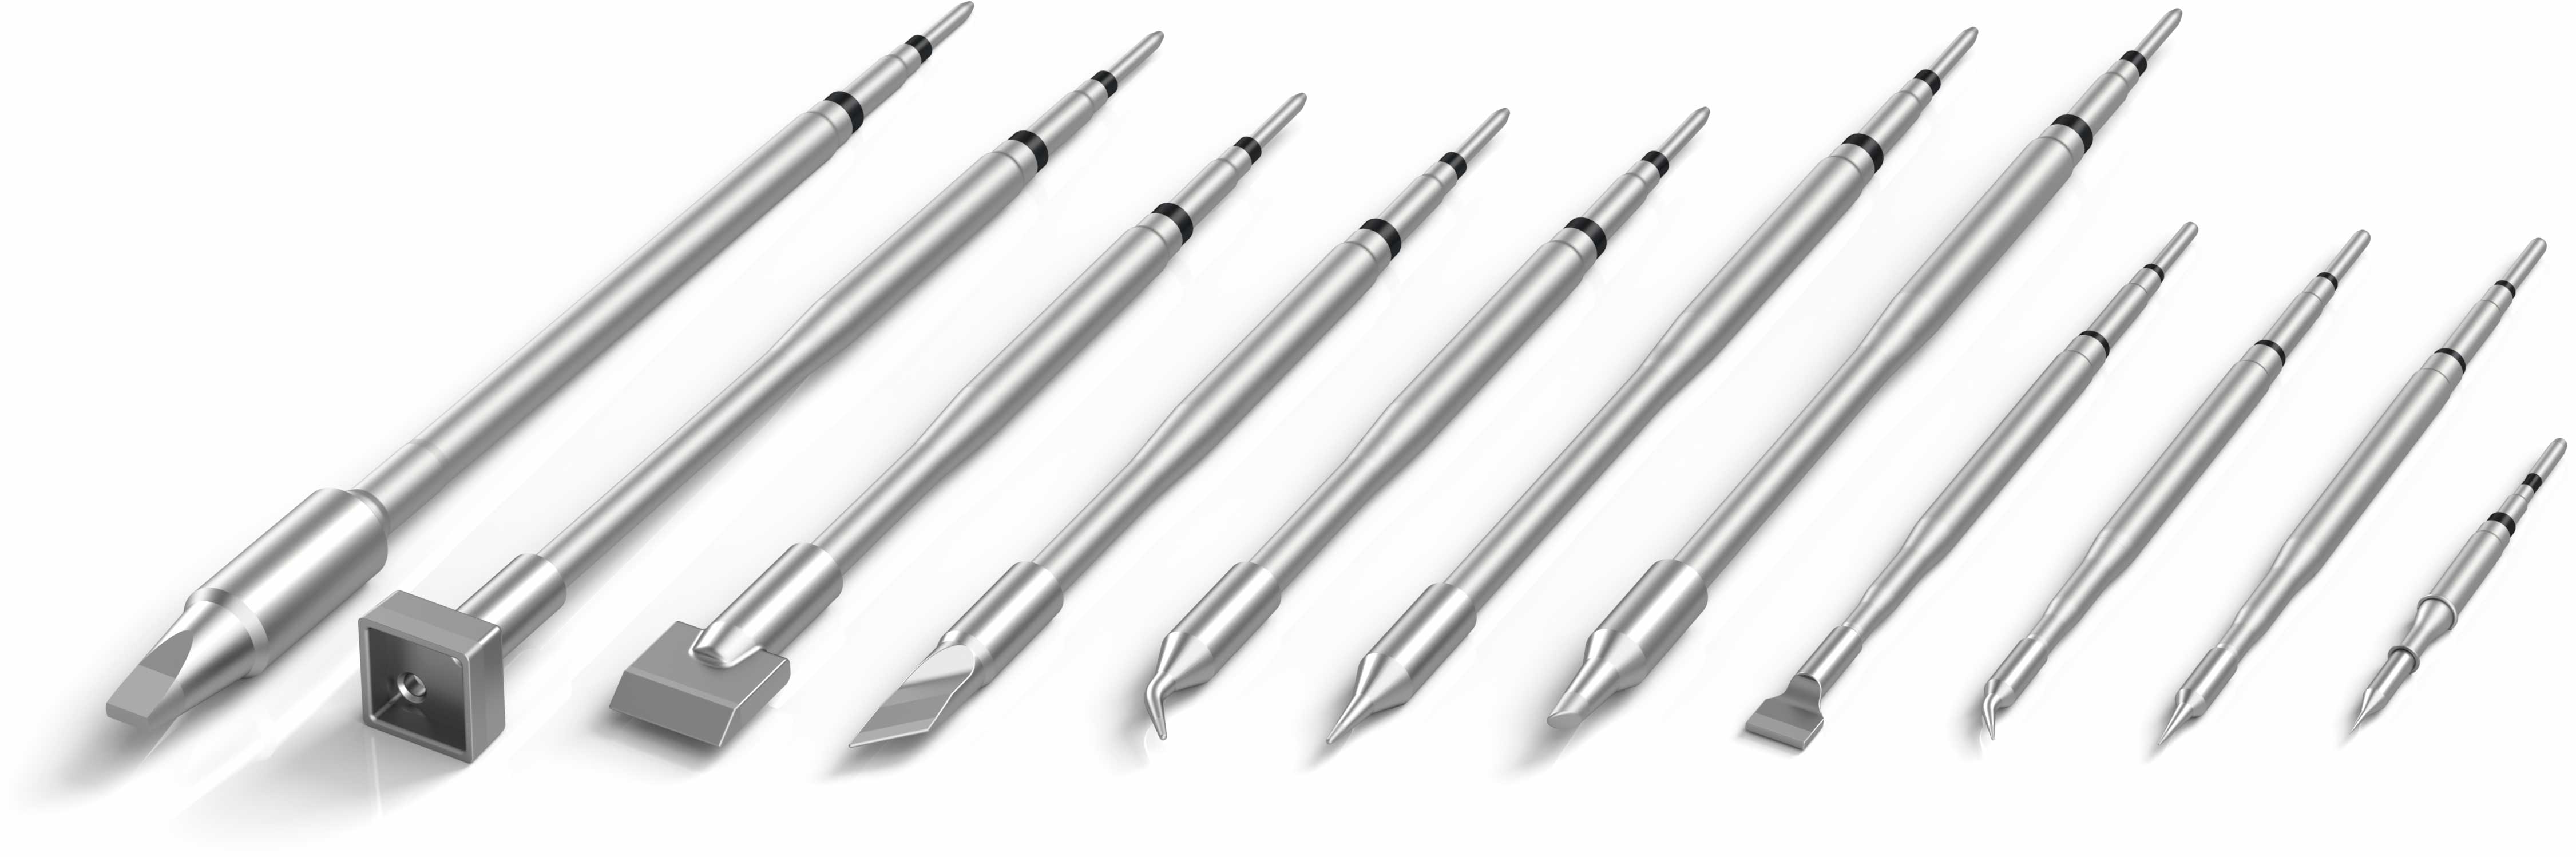
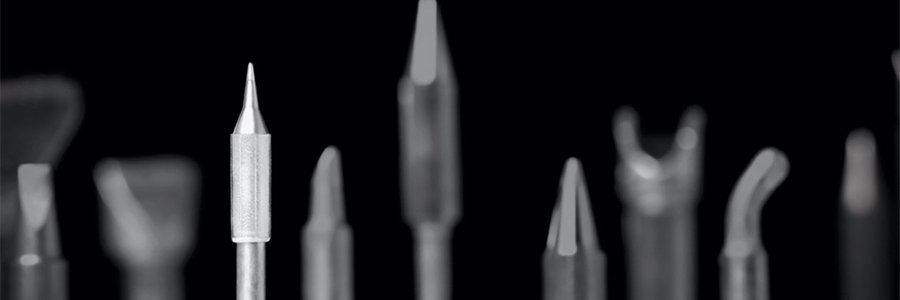
Do Not Underestimate The Importance Of Cartridge Shape
The intricacies of the modern-day PCB has meant that your choice of cartridge shape is more important than ever. Components are shrinking & practices are changing.
Therefore, it is essential that you decide on the optimal cartridge shape to improve your efficiency. To do this, there are several factors that you must consider, outlined below:
- The diameter of the tip
- How much versatility is needed from your cartridge
- Whether you are undertaking nano soldering that requires the utmost precision
- Handpiece and station compatibility
Many brands have a wide range of cartridges to select from. We always champion JBC as they have by far the most extensive back catalogue of cartridges to select from. Over 500 different variations, with custom selections also available.
To learn more about selecting the best cartridge shape, take a read here.
Do Choose Larger Tips
When selecting the best soldering cartridge for your application, it is always the case that you want to select the tip that provides the biggest contact surface with the component.
This provides the best thermal transfer possible – in turn creating a better solder joint. Larger soldering tips also improve the efficiency that you work at.
In short, you get better results in a quicker timeframe.
8 - Application Of Solder
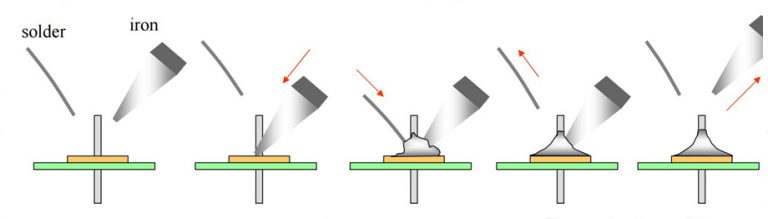
Do Not Melt Onto The Tip
Unless necessary, you should not melt solder wire directly onto your soldering cartridge (unless tinning your tips). You should avoid trying to load up your cartridge with solder and trying to transfer it across to the pad.
You should ensure that you place the solder wire directly onto the surface being soldered (as per the image below).
Do Pick The Appropriate Solder Diameter
Choosing the appropriate solder wire diameter can benefit your processes significantly. Using the appropriate diameter will avoid you having to use significant lengths of solder to cater to one joint.
Ideally, the diameter of the solder wire that you work with must be appropriate for the solder joints that you are working on. Too little and you will be constantly feeding the solder wire, whereas too large of a diameter may lead to solder bridging or other issues.
This cuts down the length of time that you are heating the pad, component, and solder tip. Which as you will be aware has a direct correlation to damage caused by overheating.
9 - Working Temperature For Soldering
Do Not Use Too High Of A Temperature
We understand why logically, people can come to the conclusion that if the solder is not melting quickly enough, they must ramp up the temperature of the soldering iron to compensate.
However, this is definitely not the case, and actually does more harm than good to your soldering process.
With increased temperatures comes an increased risk of oxidisation, PCB damage and a shorter tip life span.
Right off the cuff, using too high of a temperature can lead to localised overheating, resulting in many problems such as lifted pads, overheated solder and much more.
Likewise, if your tool is under the optimal temperature, it leads to poor heat transfer, which in turn leads to poor solder joints.
Do Solder At Lower Temperatures
When it comes to soldering, over 90% of the joints can be formed at a temperature of 350°C or less. This works to safeguard components and the longevity of your soldering cartridge tip life.
You should use preheaters in instances where you require a temperature above 380°C.
These will help to lessen the risk of thermal shock - caused by the rapid increase in temperature on a PCB.
This gets the PCB closer to the soldering temperatures you are planning to work at.
10 - Corrosion On Soldering Cartridges
Do Not Use Too Much Active Flux
Whilst flux is an essential component in the soldering process, there is most definitely such a thing as too much flux.
There is no set amount that should be used, although all excess flux must be cleaned from the board. Leaving any can lead to problems with corrosion.
To avoid this problem, start with a small amount of flux and gradually build up as and when needed. Once finished, thoroughly clean and inspect the PCB for excess residue.
For further cleaning tips for soldering, read our helpful guide here.
Do Use ROL/ REL/ ORL Flux
There are many flux classifications that are available on the market. Selecting the correct one for your processes is important.
The IPC recommends that you use either ROL, REL, or ORL flux classifications.
If you are using a smaller diameter of wire, the internal flux may not be enough. You can supplement this by adding external flux.
To Conclude…
From our experience, these are the biggest mistakes that you can make when soldering, discounting the ridiculous errors such as holding the tool at the pointy end…
Actioning our recommendations will help to streamline your soldering, avoiding niggly errors that can hurt your production time.
With soldering, efficiency is always the name of the game. Soldering is an art that takes time to master. Time using the iron is what will ultimately dictate the accuracy of your results.
Let us know if there are any common errors that we missed.
Recent Posts